Thursday, January 12, 2012

Landscaping 101

The journey of the “Cooling His Heels” project marches forward.  While ideas of add-ons and details continue to parade through my mind like a marching band, I thought I would let those ideas solidify for awhile as I focused my attention on crafting the scene that would be the new home for my cowboy.  It would have to be something that would not only showcase the figure, but a landscape that that would capture the mood of the message that I am trying to portray.
The first decision that I was faced with was the overall shape of the scene.  I enjoy landscaping in the real world, and I truly love curved lines as opposed to sharp corners.  I sat my figure on a piece of paper and envisioned where he would sit, where the stream would run and location of the other features that I wanted to include.  I decided that a circular scene would be the best shape to portray the serene feeling that I was seeking, and ten inches was the perfect diameter for the circle.

I made a trip out to my workshop and found a piece of 3/4" MDF (medium density fiberboard) that was the perfect size.  I cut a ten inch diameter circle out of the MDF using my circle cutting jig on my band saw and sanded it perfectly round using my circle sanding jig for my disk sander.  After placing my figure in the location that I wanted it, I traced in where the stream would go, making sure that the heels of the cowboy were in the right spot.

With the stream located, I used a router with a straight cutting bit to remove the wood for the stream, going roughly half way through the base.  Once the stream was routed, I positioned my figure once again and cut two more pieced of MDF out of the scraps that I would use to form a small hill that the caricature would be reclining on.  Using wood screws, I attached the two additional layers on the scene.  Once everything was positioned and attached, I used my rotary tool with a small sanding drum to round off the sharp edges and give some contour and definition to the landscape.  The following photographs show the progress at this point.


As you can see in the photo above, the rear end of my figure does not quite reach the bottom of the base.  This was by design.  If I were to relax on the bank of a stream with my feet in the water, I would want to be sitting on something comfortable.  Therefore, I provided him a nice log to sit on that cantilevers over the edge of the stream, adding to the effect.  Here’s what I came up with.

Now, with the bones of the scene in place, it was time to make it look more realistic.  Using auto body putty, I filled in the edges around the log to make it look as if it were sunk into the mud.  I also used the body putty to elevate the level of the ground where the figures hands would make contact, since it was slightly too low.  I also spread the putty around at the edge of the bank in front of the log to simulate the texture of mud.  The following is a picture of the scene after this step.

Since the bottom of a stream is not often smooth, I chose to add some texture to it.  Using Mod Podge as a binding agent, I applied course, granular sand that I had purchased years ago from my local hobby store.  Here’s the scene after the stream had been textured.

I was really starting to like the direction that this piece was going.  I got so excited in fact, that I neglected to take any more photographs of the progress of the landscape.  Here are a couple of pictures of the finished landscape, with a verbal description of the process to follow.


The sandy beach behind the hill was textured using salt.  I know it was a strange idea, but it worked out even better than I could have imagined.  The hill was formed by using model railroad grass that I purchased some time ago from an online source, and the bushes were formed using a similar material.  I brought color to the landscape using multiple layers of different shades of colors to build up the effect.

I am more than please with the final results and am getting very excited with the progress made.  I am also energized and ready to start filling in the scene with details and add-ons.  The final photographs show the finished landscape with the cowboy in his position. 


I just love the way his toes overhang the edge of the bank.  He looks so relaxed and happy to be soaking up the cool water and the warm sun.  I simply can’t wait to get this fellow painted and the scene filled in.  The next step will be to paint the figure and attach him permanently to his new home.

Saturday, January 7, 2012

Finishing the Figure

In this post, I finish carving the figure for my “Cooling His Heels” scene.  We’ll discuss how I finished the body and overcame some problems that arose as I carved it, as well as how I finished the head of my cowboy.


As you can see, I have carved the shoulder area to a rough shape.  Take note of how the shoulders are slightly forward.  This is due to the fact than when one supports his body weight with his arms in a reclined position such as the position that my caricature will be in, the shoulders are pushed forward.  I want this fellow to look relaxed, but also have the correct posture for the position that he will be assuming.  You can also see that I have roughed out the bandana and drilled a hole that will accept the neck post of the guy’s head.

Two problems arose as I carved the arms.  Here’s a photograph of the first.

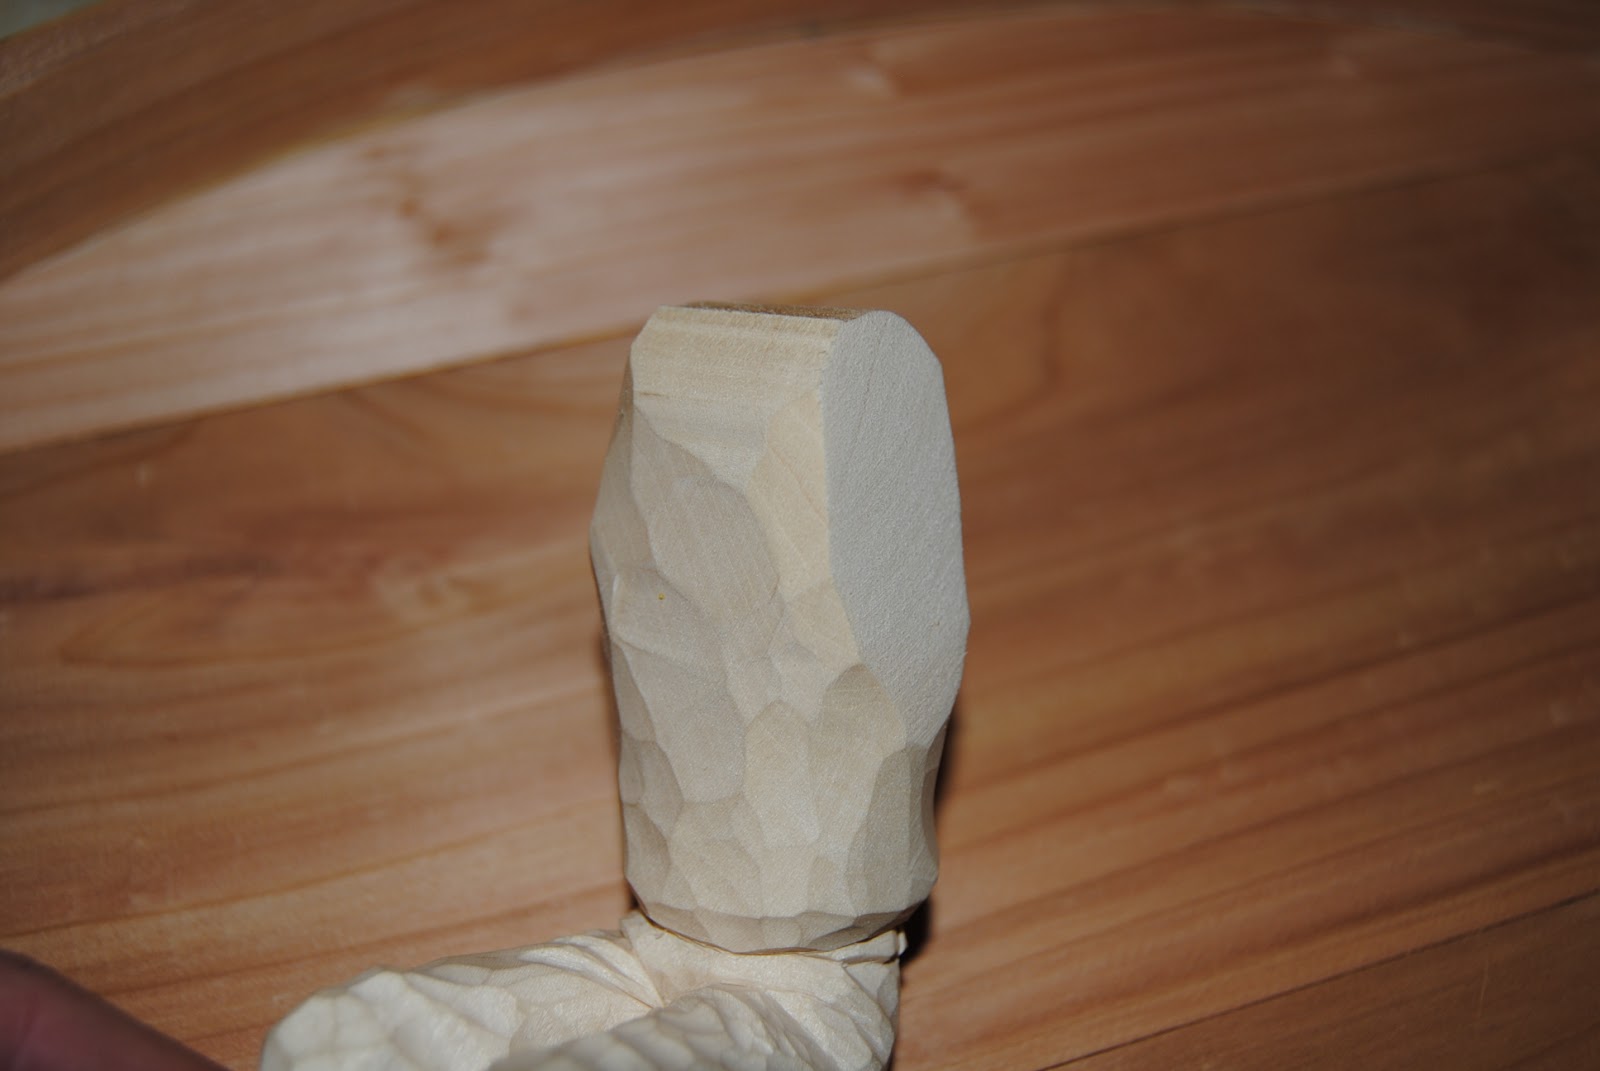
This is something that happens often when carving attachments.  Sometimes you may misjudge the depth that the dowel should be when joining the pieces together.  This is exactly what happened in this case.  The dowel went too deep and poked out through the other side when I carved down to the level of the shoulder.  If this ever happens, don’t panic.  Just keep on carving as if it wasn’t there.  You’ll see as the carving is finished, and especially when the figure is painted, that this dowel head will disappear completely.  The next photo shows the second and related problem that I ran into as I carved the other arm.

The cause of this hole was the same one that gave rise to the dowel showing through on the opposite shoulder.  Here, however, the hole is exposed and not filled by the dowel.  What do you do when you are faced with a dilemma such as this big, gaping hole?  Do you throw it out and carve another?  Of course not.  For now, I will simply not worry about it and continue carving the arms until they are fully detailed.  Once the arm is completely carved, I’ll show you the best solution.

I decided to put the body aside for a while and work on carving the head for my figure.  I wanted to catch the proper expression on this cowpoke’s face, one that would show the pleasure that he would be feeling soaking his aching feet in a cool stream on a warm, sunny afternoon.  I decided to carve the eyes closed, and to add some interest, I carved a lock of hair sweeping down over one eye.  Here’s a look at how the face turned out.


The photograph above shows the test fit of the head to the body.  I have started detailing the bandana at this point and have the body and arms almost complete.  You can see that the head sits up too high, giving the figure a giraffe neck.  I’ll carve away material from the neck area as well as the bandana until the head sets down at the proper position.  You can also see in this picture where the end of the dowel has been carved away as part of the shoulder.  Now, the only thing that makes it noticeable is the fact that it is a different color than the rest of the body.  This will completely disappear once he gets his colors.

Here is a picture of the other shoulder, the one that has the hole where a hole shouldn’t be.  You can see that I have gone ahead and carved in the folds in the sleeves and this is what I was left with.  So, what do you do to cover a mistake as big as this one?  Well, they don’t make wood putty for nothin’!  Using a little wood filler, I squeeze out a bit onto my finger and press it into the hole and smooth it into the crease of the sleeve.

Once the filler sets up and is completely dry, I simply sand it down smooth.  When you make this kind of repair using wood filler, you do have to realize that the filler will not accept paint the same as the rest of the wood.  When you paint with thin washes of acrylics like I do, you have to take this into account when you apply the colors.  Since this repair is in the bottom of a fold of clothing, it shouldn’t be too hard to disguise.  Once the figure is complete, you will be hard pressed to find the repair.  Just wait and see.

The following are a few photographs of the completed figure.  I have added some accent lines with my wood burner as well as division lines that will help to separate different colors when I paint, without bleeding into each other. 


With my figure complete, it’s time to move onto the landscape that this fellow will go into.  In the next post, I’ll walk you through my decision making process as well as fill you in on the mechanics of completing the landscape.

I hope that you are enjoying your journey along with me on this project.  Sometimes I feel like I’m making every possible mistake with this one, but maybe it’s meant to be that way so that you will know what to do when you are faced with similar challenges.  Please leave me a comment, or drop me an email.  I would love to know if you have any questions or other ideas of how better to solve carving problems.  Thank you for following along, and for all the support that you give to The Old Stump.

Thursday, January 5, 2012

Attaching the Arms

We last left of having detailed the hands and roughed out the upper portion of the arms.  In this post, I will show you how I attached the arms to the body.  Here are some photos of where we left off with my last post.


To begin with, we need to have a perfectly flat plane on both the arms and on the torso in order to get a seamless bond between them and attach them together without them looking “attached”.  After a trip out to my shop and a few moments on the disk sander, here is where I was at.


You can see from the photos that the areas that will be glued together are indeed flat and ready to be attached.  This is the little gizmo that I invented for lining up attachments in the right location.  I have blogged about it before, so feel free to browse through the previous posts for a complete explanation.


With my pins pushed into the arms where the dowels will eventually go, it’s time to fit them to the torso in just the right location.  Here’s a photo with the arms placed in the right spot.


The above photograph shows the arms and torso with the pins removed.  Notice the holes left behind by my positioning pins.  That’s exactly where I need to drill my dowel holes.  The following are a few photos after 1/8” dowels have been fitted into the holes.


Now, I will fill the holes in with some quality wood glue, I use Tightbond II, reinsert the dowels, and spread a thin layer over the joining surfaces.  Once glued, I will wrap some rubber bands around the arms and body to clamp them in place until the glue sets up.  In the next post, we will finish detailing the arms and maybe get the head done.  I hope you are enjoying following along with me.

Thursday, December 29, 2011

Twelve New Knives

My inventory of knives has been looking awfully sparse as of late.  I took some time out of my holiday vacation, in between Christmas cookies and crispy treats, to make a few more knives.  I'm extremely pleased with how they all turned out.  The variety of wood used for the handles is due to an early Christmas present that I received from a great man who goes by the name of Goody on the Woodcarving Illustrated forum.  Thanks Goody!  There truly is a Santa Clause!  Here's a group photo of all twelve.


Click the Knife Gallery tab at the top of this page to get a full description of each knife, or to purchase your favorite.  Thanks for stopping by. 

Now, time to get back to Cooling His Heels.

Tuesday, December 20, 2011

On to the Arms

With the legs and feet completed, it’s time to move on to another area of the figure.  I don’t want to do any carving on the torso until I have the arms positioned properly.  I want to make sure I leave myself plenty of wood to fit the arms in a natural position.  With that in mind, I begin carving the arms.

Here’s a photograph of the arm in a rough-out stage.  The hand is turned out at a ninety degree angle.  My intentions are to have the arms angled back supporting the reclining body and the hands angled perpendicular to the body in a natural position.  I will not do any carving on the arm above the rolled-up sleeve until I have the attached position to the body figured out.  Therefore, I will now move to the detail work on the hands.


The above photo shows the fingers penciled in on the bottom of the hand.  Notice that the middle finger is the longest, and the other fingers fan out from there.  These will give me some guidelines to follow as I start detailing the fingers.


These two photos show the hand blocked out and ready for some detail.  Always carve the basic shapes out before attempting to carve in the details.  It’s good practice and helps to conceptualize the finished piece.


The above pictures show the completed hand from different angles.  Working in the endgrain was a challenge, and I might have been better off carving the hand as an attachment, but, I’m quite pleased with how things turned out.  The palm of the hand was not completely carved, since it will be facing down on the landscape of my scene.


The final photograph shows the arm held against the body in the approximate position for the finished composition.  I considered making the hands larger, but I really wanted to add extra emphasis on the size of the feet.  I can picture this fellow leaning back, soaking his feet in the cool water, with a gigantic grin on his face.  The concept seems to be coming together rather nicely.  Now, one more arm to carve and I’ll get the arms attached to the body.

Wednesday, December 14, 2011

A Successful Surgery

As you may remember from my post earlier this week, I was not satisfied with the way the feet turned out on my figure for the “Cooling His Heels” project.  After careful consideration, I came to the decision to amputate his pathetic little toes, and perform some judicious reconstructive surgery.  As you can see in the photographs below, the surgery was a complete success!


I am so much more satisfied with the feet now.  They now represent my ideal of what caricature feet should be.  The gentle curves and angles of the toes are so very pleasing now and the proportions are perfect for the mood I was attempting to portray.  Let’s have a look at the before and after photographs and perform a short critique.


The first photograph shows the foot the way it was originally carved.  Notice how the toes look deformed, small, and not very interesting; not to mention that one toe is missing completely.  After the repair, the toes have a nice curve to them, they are long, and have a natural shape.  Notice as well that the glue joint is almost invisible, and with a careful paintjob, it will disappear entirely.  Even though they have been exaggerated in the way all good caricatures are, they are still identifiable as toes and have a quality of uniqueness about them. 
Since the feet are to be the main focus of this project, it was imperative that I get them right.  Now, they should look fantastic, sticking up out of the bubbling little stream that I have envisioned in my mind.  With the successful surgery behind me, I am now completely satisfied with this feature and ready to move on to the next stage of the design.
The moral of the story here is, when something goes wrong and you make a mistake, don’t abandon your efforts.  With a little more thought and labor, you can fix your blunder.  Although sculpting in wood is generally a “subtractive” art, where material is removed until the subject is revealed, with a little thought and a bottle of carpenter’s glue, a seemingly disastrous mistake can turn into a satisfying triumph.  After all, we use add-ons on our carvings all of the time.  I have simply added-on some rather nice looking toes.

Monday, December 12, 2011

When Things Go Wrong

I've had little time to dedicate to my “Cooling His Heels” project over the past week.  But, I have made some progress on the lower body.  The photos below show the progress that I have made on the legs and feet of my reposing cowboy:


I am pleased with the manner in which the pants and legs have turned out.  I managed to get some nice fold details incorporated into the design.  There is one particular area in which I am not pleased and that is the feet.

The general shapes and details of the foot are spot on and quite pleasing, but, for all the “extra” wood I set aside for carving the feet, I did not leave myself enough.

As you can see in the photo above, I did my best to “squeeze” the toes into the available wood.  I really wanted the big toe to be large and exaggerated.  It should look great sticking up out of the stream of water in the final piece and I am quite pleased with the outcome.  After carving the first “Little Piggy”, I was left with even less wood to work with.  After mulling it over for a time, I made the decision to carve only three more toes onto the foot.  As the photo shows, even carving three toes in this small amount of space was pushing the limits.
After looking it over, and a few long moments of head scratching, I decided that the looks of a four-toed cowboy just wasn’t going to make the cut.  I wanted this piece to be a special one, so, anything less than my best effort would not be acceptable.  Therefore, as I promised at the beginning of this journey, I will show how I overcame this problem.
The way I saw it, I had three options.  The first option was to throw out the entire piece and start over again.  Second, I could cut the feet off below the rolled-up pant legs, carve a new set, and reattach them as an add-on.  Finally, I could attach more wood to the foot and recarve the toes.
I had put a significant amount of effort into this figure at this point, and I really liked how the pants of this hombre had turned out, so option one was out of the question.  Option two was a good solution, but, once again, I liked how the big toe turned out and the overall shape of the foot.  Ultimately, I chose to go with option three. 
Tip from the Stump:  There are almost always simple solutions to seemingly insurmountable problems when it comes to carving.  Don’t throw the baby out with the bathwater!  As in this mistake, a simple glueup can save you hours of carving a piece over again.  Moral: don’t give up.  Adapt and overcome.
After a quick trip out to the shop, here’s how the feet looked post-amputation.


I amputated the deformed feet with my stationary disk sander, sanding off the three decrepit toes.  Sanding the area perfectly flat makes a smooth and consistent surface for gluing.  I scrounged through my cut-off box and found a couple of small chunks of wood that I could use for this glue up.  After sanding the mating surface of the prosthetic pieces of wood, I glued them onto the feet using carpenters glue and rubber bands for clamps.  The following photo shows a seemingly successful addatoetome surgery.

I know that the amount of wood I have attached is somewhat excessive, but I’m not going to be left wanting for wood again!  Once the glue is completely dry, I will attempt to find four more toes in those new blocks, and if everything works out as planned, I’ll be back on track again in no time.