Friday, April 8, 2011

Custom Knife Orders and Competition (Win Your Own Custom Knife)

I’ve had some interest lately in my custom carving knives, in that people are wondering if they can “special order” a specific blade or handle shape that is not listed on the Knife Gallery Page.  The answer is a resounding “YES”!!!  I am always more than happy to take a special order if you have something particular in mind and I have the ability to fill the order. 
Why, just today, I received an email from a customer asking if I could make a specific shape of blade.  He attached a photo of the blade that he wanted and asked how much extra it would be for me to make one like that.  I was more than happy to craft him a knife to his specific length and shape of blade, and the price of a true “custom” knife is the same as for any of my other knives, a measly $30.00.
So, moral of the story, if you want a special blade or handle, send me an email with a sketch or a photo of the knife that you want, be specific now, and I’ll do my best to fill your request.  So, show your support for The Old Stump Blog by ordering your own knife today.
All that aside, I’m about ready to start another tutorial.  I would like to do something directed toward the beginners in the group, who might not have the self confidence yet to attempt something more advanced.  I thought that it would be fun to get some feedback from you, my faithful followers, and maybe make a competition out of it.  Here’s my idea:
Submit your idea for a beginner-level carving to theoldstump@live.com , being specific and original.  I will sort through the submitted ideas and choose the one that I like the best.  Yes I know, that’s not very subjective, but hey, this isn’t Burger King!  Here are the rules:
·         All ideas must be original
·         Any idea will be entertained (you don't have to stick with medieval or cowboy themes)
·         The idea must be “beginning carver level”
·         You can submit as many ideas as you would like, just do so in separate emails
·         Submit all entries to theoldstump@live.com with the title “Carving idea” in the subject line
·         All ideas must be received by Saturday, April 23rd to be eligible for consideration
The chosen submission will then receive as a reward a Free Custom Made Carving Knife of his/her own specifications and have their idea implemented in the next tutorial.  So, put on your thinking caps and let’s see what you come up with.

Monday, April 4, 2011

My Tool Box

I thought that it might be kind of fun to let you have a peek at, and into for that matter, my tool box.  I made this old thing out of some scrap pieces of pine that I had laying around my shop.  I build it as a prototype, but it worked so well that I have been using it ever since.  The construction is simple, all butt joints and screws, but it's durable and keeps all of my tools handy.


Inside the little drawer at the bottom I keep my strop, some honing compound, a couple of dowels for add-ons, some super glue, and a couple of pieces of sandpaper.  The drawer is shallow, but I find it quite useful.  Here's a look under the hood:


As you can see, I don't really have very many tools in my box.  It looks like I have 17 palm tools and 12 knives, a few of which I use all of the time, and some that I hardly ever use.  In fact, most of the knives that I have in the box I made as prototypes themselves to test out new blade shapes and lengths.  Actually, I only use about 4 of the knives at all.  I guess I just like to look at the others.  Of the palm tools, I probably use 9 of them all of the time, and the rest I will use every now and then.  See what I mean about not needing very many tools to produce some nice carvings?

All of the palm tools are arranged according to width and profile so that I know where each is without guessing.  All of my knives are also arranged in three rows: rough out, general carving, and detail.  I suppose that one could put some labels on each tool so that he could tell them apart, but this system works for me.

Also in the box you can see my glove and thumb guard in the lid, an assortment of small files to get into those hard to reach places, and a pencil and sharpie to draw with.  That's really all that I use to get the job done.  Here's a picture where I have removed the palm tool insert so that you can see the construction underneath.


As you can see, none of the tools edges can touch each other because of the grid that I made out of 1/4" plywood.  The only thing that I would like to change is to add some foam or some rubber at the bottom of the box so that the points of my knives are protected.  Right now, there is only a piece of cardboard, but it seems to be getting the job done.

Wednesday, March 30, 2011

Demystifying Wood Grain

Because many beginners, as well as seasoned carvers alike, often have a difficult time understanding and dealing with wood grain and all of the difficulties that arise because of it, I have compiled a document entitled "Demystifying Wood Grain, a Wood Carving Primer."  In this tutorial, I attempt to demystify the somewhat elusive subject of wood grain and how to deal with it properly.  I hope you will stop by and take a look, but mostly, I hope that it is useful to you by shedding some light on this sometimes difficult subject.

Here's the link:
Demystifying Wood Grain

You can also link to it from the Tutorials Page.  Happy Carving.

Tuesday, March 29, 2011

The Picture Gallery

If you haven't visited my Picture Gallery page lately, you might be pleased to know that I have reduced the prices on many of my carvings.  Although parting with one of my pieces is like giving away one of my kidneys, I'm simply running out of room in my house to display my creations properly.  Since I would rather sell them to a collector than put them into a box for storage, I have drastically reduced many of their prices.  So, if you've had your eye on one of my carvings, I hope you will take advantage of this "Sale" and help me clear out some space for new pieces.  If you aren't interested in purchasing one, that's okay too, I still invite you to stop in and take a look at my work, it's my bragging page after all.

Thank you all for your interest in The Old Stump and I hope what you find here is helpful, inspirational, and entertaining.

Monday, March 28, 2011

My Latest Knife

It's been a while since I last posted.  I've been awful busy the last couple of weeks getting the yard cleaned up for spring and working on the list of "Honey Do" projects that just seems to keep growing.  Why is that I wonder?  Because of my busy schedule, I haven't had much time to dedicate to carving.  I have made a little headway on my knight; the head is done and the body is underway.  I also found out that my friend lost his horse of many years, so I put my knight on hold for awhile so that I can carve him a horse to show him my sympathy.  I'll take a few pics and get them posted to the Carving Bench page.

I did manage to fill a knife order last week for a customer, and I have to admit, it's probably the most beautiful knife that I have produced.  The octagonal-dolphin-shaped handle is made out of apricot, and the grain was just amazing.  Here are a picture of the knife:


There are a few more pics in the Knife Gallery page, just scroll all the way to the bottom.  You don't see that kind of grain very often, but when you do, it sure is a wonder to behold.  I still have a few more knife handle blanks of this apricot left and if they produce handles half as nice as this one, I will be pleased.

I've been kicking around ideas for another tutorial.  I received some good feedback from the Archer Bust Tutorial, and though that it would be fun to start another one soon.  If you have some ideas that you would like to have me entertain, leave a comment or send me an email.  Several have said that the Archer was too advanced for them.  Would you rather see something more simple; a beginner's tutorial perhaps?  Or would you rather see something more complicated?  Or maybe, just another bust of some interesting character?  Let me know if you have any ideas.

Saturday, March 12, 2011

Live Long and Prosper

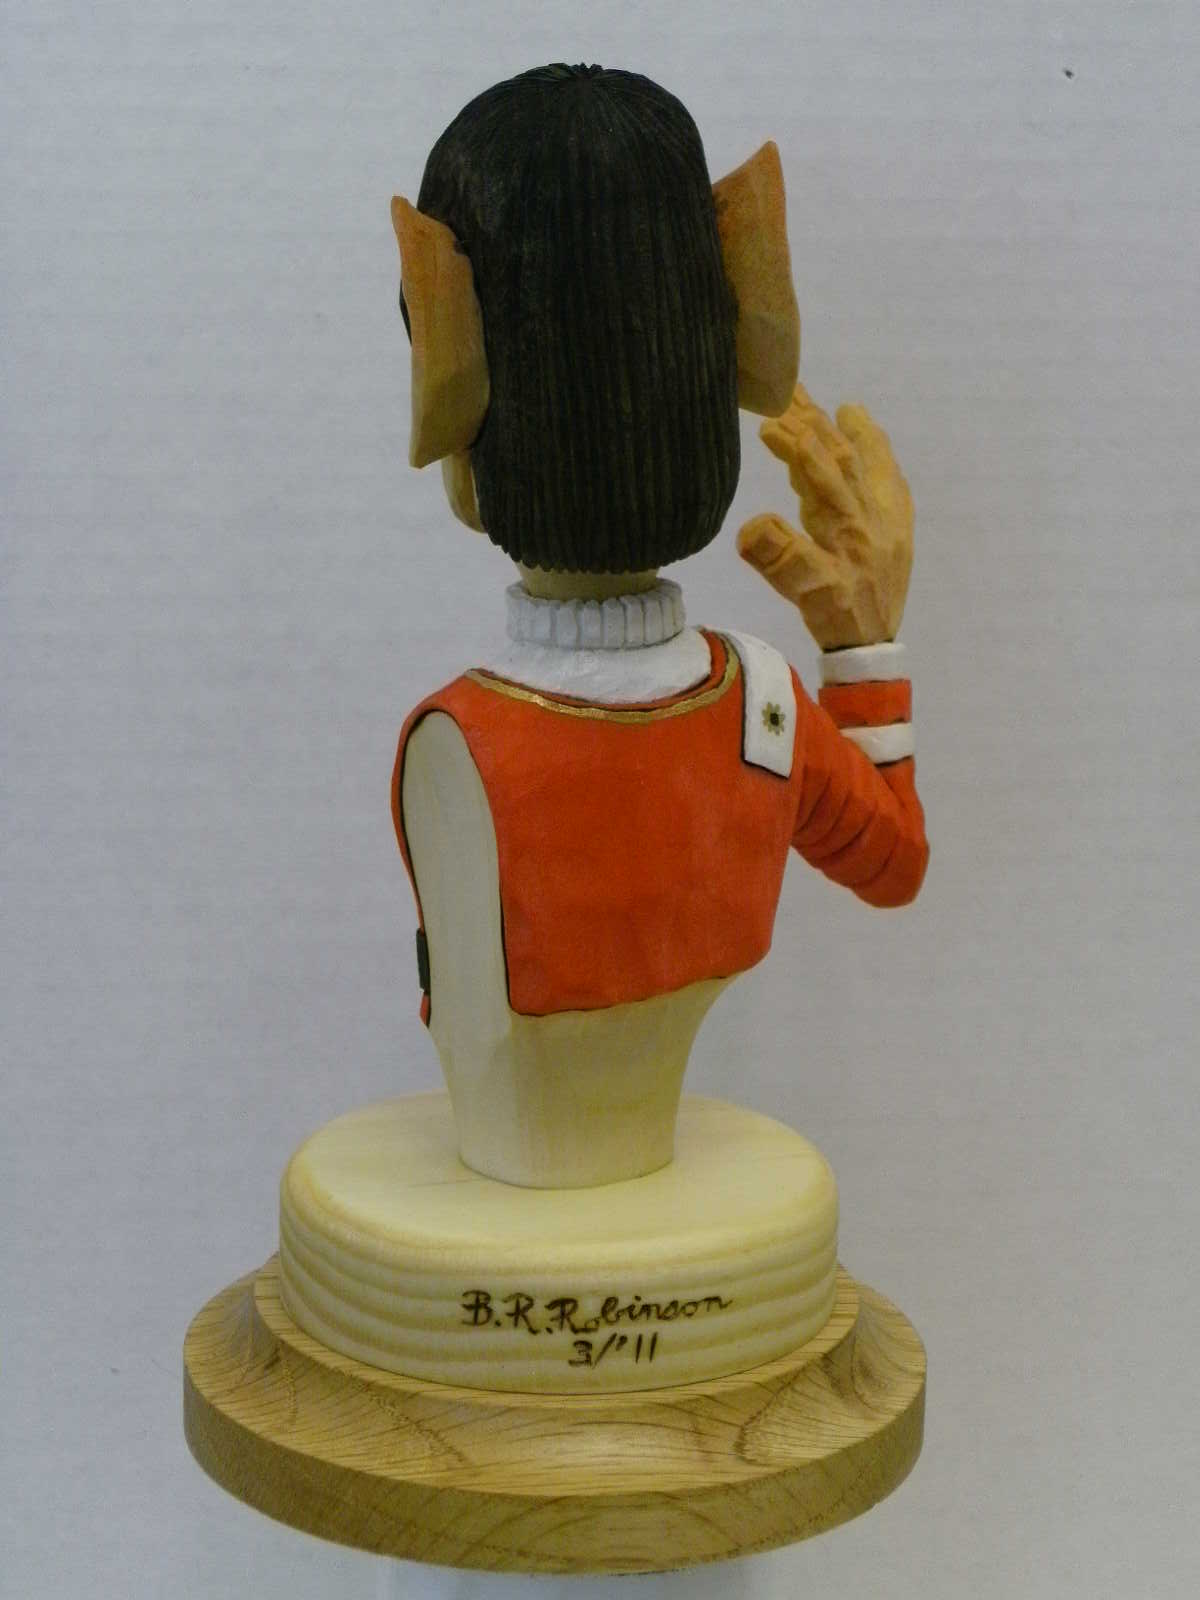
This one's for all of you Trekies out there.  May I present, the First Officer of the Star Ship Enterprise all cleaned up in his dress uniform.


I think Mr. Spock turned out quite well.  My wife said that it's her favorite bust that I have ever carved, and he rates right up there on my own scale too.  Of course, I wasn't going for an exact likeness, but I think I got some of the most important features: the hair, the eye brows, and the serious look.  I sure like to carve these little busts; they really bring me a lot of pleasure and since I can carve them in a couple of days, they never seem to get old.

I'd sure like to know what you think, so leave a comment or drop me an email.  Lots more photos in the Picture Gallery.  Stop in and take a look.

Friday, March 4, 2011

The Peasant

Here's a little bust that I did before starting on the next big project.  He's kind of simple, but he was a fun little study.


I do have a confession to make.  When I started carving the head, I thought that I would carve a knight with a big mustache and a huge grin on his face.  In my zeal to carve the smile, I forgot what I was doing and took off too much wood with out leaving enough wood for the mustache.  So, the knight turned out to be a peasant.  Just goes to show that even when a carving takes a different turn from where you intend it to go, good things can still come out in the end.

Tip from the Stump:  when you make a mistake, and believe me you will, don't throw your carving in the fireplace, take another look at it and make the best of things.  Serendipity is on your side.

There are a lot more pictures in the Picture Gallery.  Stop in and take a look.